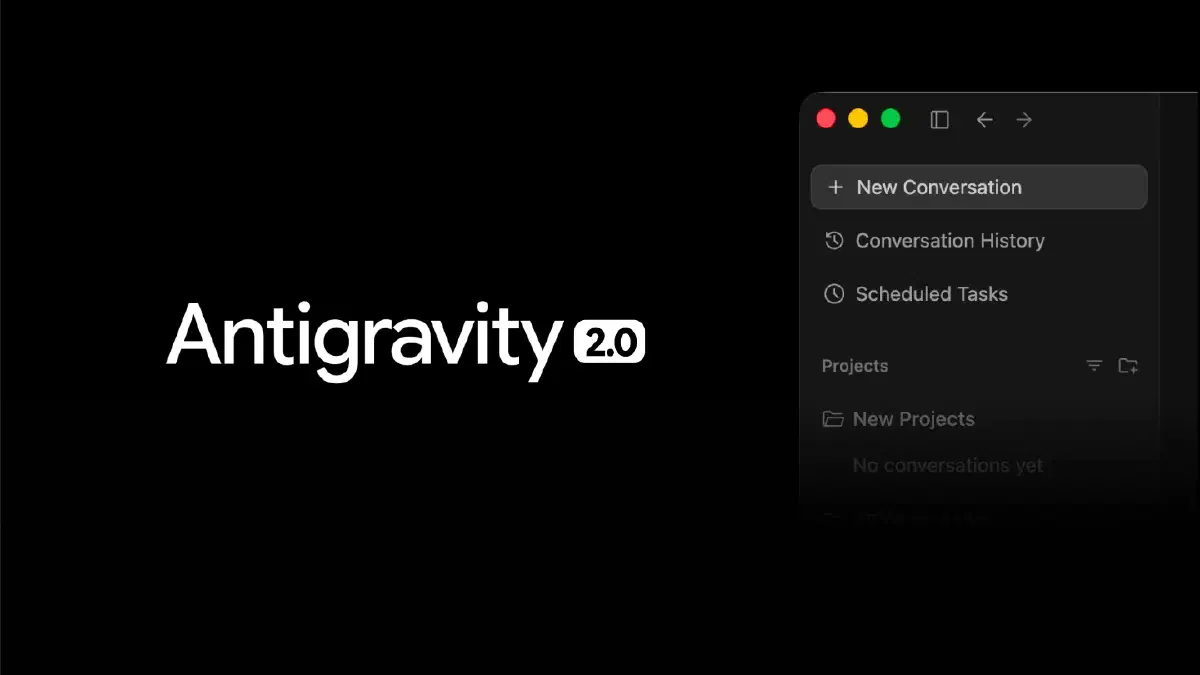
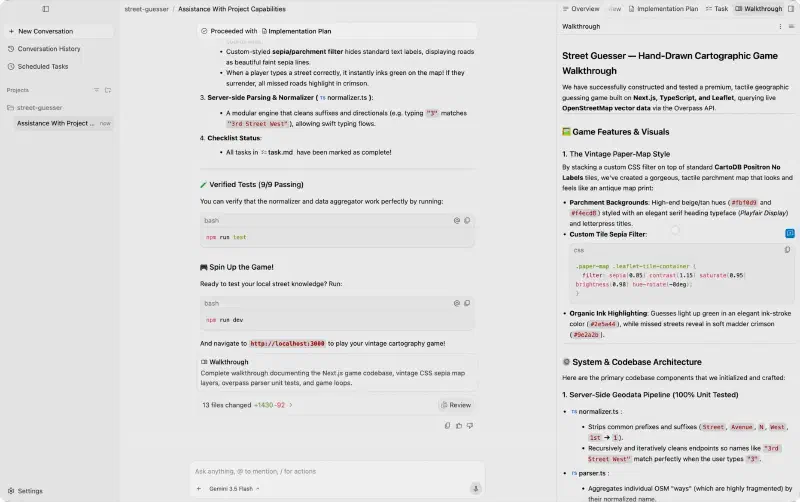
Google just shipped Antigravity 2.0 — and if you ran the installer expecting a familiar IDE upgrade, you likely ended up staring at an agent chat window with no code editor in sight. Worse, your existing Antigravity IDE may have stopped launching correctly entirely. Neither of these is a user error. Both are documented bugs and design shifts baked into the 2.0 release.
This guide breaks down what actually changed in the platform architecture, walks through two critical bugs shipping with the release, and shows you how to configure a production-grade Dual-Wielding setup that Google itself recommends.
Why Antigravity 2.0 Exists: The Architecture Behind the Split#
From Agent Manager to Standalone Desktop App#
When Google launched the Antigravity IDE back in November 2025, it embedded an “Agent Manager” panel inside the IDE — a second surface stripped of the editor UI, focused entirely on agent conversations and multi-agent orchestration. It proved remarkably popular even for non-development tasks. Knowledge workers, researchers, and operations teams adopted it far beyond the developer audience it was built for.
That signal led to an architectural decision: extract the Agent Manager from the IDE, rebuild it from the ground up as a standalone application, and optimize it for general knowledge work rather than tying it to a code editor. The result is Antigravity 2.0 — a pure agent control hub with no file tree, no syntax highlighting, and no terminal panel.
The 4-Surface Portfolio Breakdown#
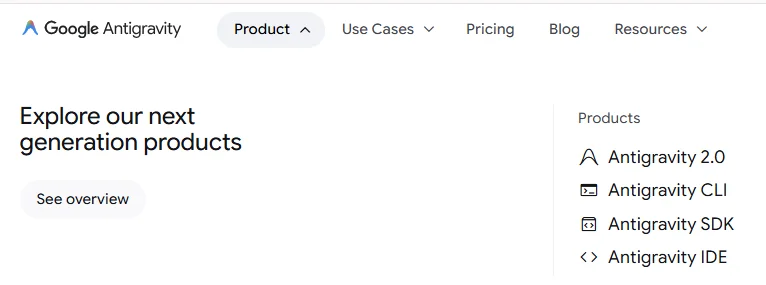
The 2.0 release formalizes Google’s Antigravity ecosystem into four distinct surfaces, each with a clearly scoped role:
| Surface | Role | Primary Audience |
|---|---|---|
| Antigravity 2.0 | Standalone agent control hub — conversation management, async task orchestration, multi-agent coordination | Knowledge workers, general professionals |
| Antigravity CLI | Terminal-first lightweight agent; replaces the former Gemini CLI | Developers who prefer keyboard-driven workflows |
| Antigravity SDK | Python-based agent prototyping and self-evaluation toolkit | Engineers building autonomous pipelines |
| Antigravity IDE | Full code editor with deeply integrated agent capabilities | Developers who need editor + agent in one window |
The Agent Manager panel inside the IDE will be removed in an upcoming release. Until then, both surfaces coexist, but the strategic direction is clear: 2.0 is the agent layer, the IDE is the editing layer.
Critical Bug Report: The Electron app.asar Directory Collision#
This is the bug most users hit within minutes of running the 2.0 installer.
Root Cause Analysis — How the Installer Breaks Your Existing IDE#
The 2.0 installer contains a packaging error. When it runs, it drops the app.asar bundle — the compiled 2.0 application code — into the same directory as your existing Antigravity IDE installation, specifically next to the IDE’s own app/ subfolder.
Electron’s runtime has a strict load-priority rule: if it detects an app.asar file alongside an app/ directory, it loads the .asar archive and ignores the folder. The practical consequence is devastating: both Antigravity IDE.exe and Antigravity 2.0.exe now point at the same overwritten directory, and both launch the 2.0 agent shell regardless of which shortcut you click.
This was reported extensively on Hacker News within hours of the release. It is a confirmed installer packaging defect, not a user configuration issue.
Fix — Installing 2.0 to an Isolated Path#
The only reliable fix is to redirect the installer to a fully independent directory before the first installation completes.
During a fresh install:
- Launch the Antigravity 2.0 installer.
- When the installer prompts for the installation directory, do not accept the default path.
- Manually specify a completely separate folder, such as:
- Windows:
C:\Program Files\Google\Antigravity 2.0\ - macOS:
/Applications/Antigravity 2.0/
- Windows:
- Complete the installation from that isolated path.
If the default path overlaps with your existing IDE directory, the installer will silently overwrite the app.asar and corrupt both applications.
Already Affected? Recovery Steps#
If you already ran the installer and both apps now launch the 2.0 shell, follow these steps:
- Close all Antigravity processes completely.
- Open a file explorer and navigate to your existing IDE installation directory (typically
C:\Program Files\Google\Antigravity\on Windows or/Applications/Antigravity IDE/on macOS). - Locate the
app.asarfile that the 2.0 installer injected at the root of that directory. - Move or delete the
app.asarfile. Your IDE’s ownapp/folder should remain untouched. - Re-run the 2.0 installer and specify the isolated path described above.
After this, the IDE will resume loading from its app/ directory, and 2.0 will load from its own isolated app.asar in the new path. No reinstall of the IDE is required.
Second Bug: Antigravity IDE Agent Permissions Regression#
Separate from the installer collision, a permissions regression affects the latest Antigravity IDE release itself.
Symptom — Silent Permission Popups and Hanging git Operations#
In the current IDE release, the agent permission popup — the dialog that asks you to approve or deny a terminal command before execution — stops appearing entirely. The agent receives no authorization signal, enters a waiting state, and hangs indefinitely.
The most visible symptom is that basic git operations fail silently. Commands like git status, git fetch, and git pull freeze at the agent layer rather than executing. The commands are valid; the authorization path is broken.
This was reproduced across clean environments: fresh Git reinstalls and fresh repository clones both exhibit the same behavior. The root cause is inside the IDE’s permission plumbing, not in the local environment. For reference, the same repositories operate without issue under Claude Code, which confirms the defect is IDE-specific.
Do not upgrade to the latest Antigravity IDE if you depend on agent-driven git workflows. The permissions regression currently blocks all terminal command authorization, making autonomous coding tasks unreliable.
Workaround — Downgrade to Antigravity IDE 1.23.2#
Until Google ships a fix, the recommended approach is to stay on or roll back to the last stable release.
- Fully uninstall the current IDE version.
- Visit the official releases page at https://antigravity.google/releases.
- Download Antigravity IDE 1.23.2, the last confirmed stable build.
- Install it to your standard IDE path (separate from the 2.0 path you established above).
Hold at 1.23.2 until an official patch is announced. The agent permission popup should function normally in that build.
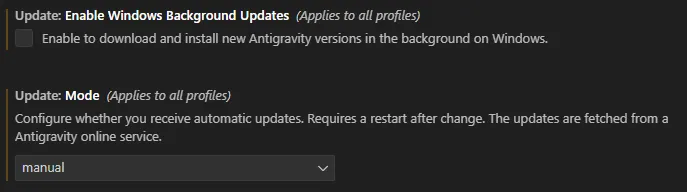
- Open the Command Palette using
Ctrl+Shift+P(macOS:Cmd+Shift+P) and select Preferences: Open Settings (UI) to access the Editor Settings. - Change the following two options to disable auto-updates:
- Update: Mode: Change the default value to
manualornone. - Update: Enable Windows Background Updates: Uncheck this option (applicable to Windows users).
- Update: Mode: Change the default value to
Setting Up the Dual-Wielding Workflow#
What “Dual-Wielding” Means and Why Google Recommends It#
The most common point of confusion after installing 2.0: where is the code editor?
There isn’t one. Antigravity 2.0 is a pure agent orchestration layer. It has no file browser, no code editing panel, no terminal — only an agent conversation interface and task management surface. If you need to write or review code, you need a separate editor running alongside it.
Google’s official recommendation is to run Antigravity 2.0 and your IDE of choice side by side on the same monitor — a workflow they call “Dual-Wielding.” The agent in 2.0 can operate on your filesystem and repositories while you observe and edit in the IDE, creating a tighter feedback loop than either application could provide alone.
Identifying the Two Apps on Your Dock#
Both applications share the same Antigravity logo, which creates confusion in docks and taskbars. The distinction is the logo background:
- Antigravity 2.0: Logo on a clean white background.
- Antigravity IDE: Logo on a dark grid background.
This is the only visual differentiator at a glance. Pin both to your dock and you can switch between them without reading the window titles.
Configuring Project-Based Context#
Antigravity 2.0 introduces a structural change in how agent conversations are scoped. The previous model grouped conversations by “workspace” — essentially a single repository. The new model uses “Projects,” which can span multiple folders and enforce their own permission settings independently.
This matters for Dual-Wielding: you can define a Project that covers your primary repo, a shared utilities directory, and a documentation folder simultaneously. The agent can traverse all three without losing context or requiring separate sessions. Combined with the 4-stage security whitelist covered below, Projects give you the precision to grant broad access where you trust the agent and restrict it where you don’t.
Power Features Deep-Dive#
/goal — Assertion-Based Autonomous Task Completion#
/goal instructs the agent to run a task end-to-end without requesting intermediate confirmation. The agent loops — planning, executing, verifying — until it can prove the declared final state has been reached.
The critical design principle: the stopping condition must be measurable and verifiable by the agent itself. A goal like “fix all the errors in this directory” has no clear terminal state. The agent cannot prove success, so it either loops unnecessarily or stops arbitrarily.
A well-formed /goal looks like this:
/goal — Migrate all call sites to the new authentication API.
Done condition: all Python files compile cleanly, `pytest` exits with code 0,
and `git status` shows no uncommitted changes.
The agent can verify each of those conditions programmatically. It stops when all three pass, commits the changes, and reports back.
Before running /goal unattended, configure a budget guard in your project’s JSON hooks or budget_limit profile. This caps the maximum token spend and execution steps for the session. The agent halts at the limit and returns to idle if the goal is not yet met — preventing a runaway loop from consuming an uncapped budget.
/schedule — Cron-Based Background Automation#
/schedule registers a task to run automatically on a cron expression. There is no need to manually invoke the agent for recurring work.
A practical production example: schedule a daily log analysis that runs at 09:00 on weekdays, collects overnight error logs from your batch pipeline, and writes a structured troubleshooting artifact to a shared directory. Set it once; the agent handles every recurrence.
/schedule 0 9 * * 1-5
Collect all error entries from logs/batch/*.log written since yesterday 17:00.
Write a structured incident report to reports/daily-{date}.md.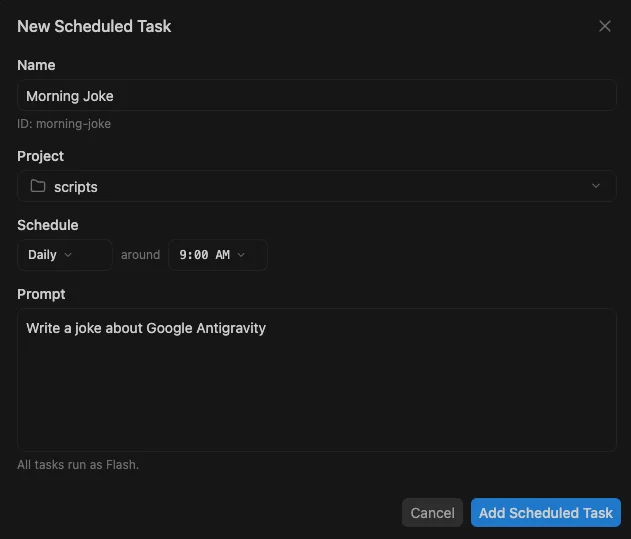
Dynamic Subagents — Parallel Work Without Context Pollution#
In complex tasks, a single agent context window accumulates noise: intermediate reasoning, discarded approaches, partial outputs. As the window fills, inference quality degrades and costs compound.
Dynamic Subagents address this directly. When the main agent identifies a discrete sub-task — a module refactor, a test suite run, a documentation pass — it spawns an isolated child agent for that work. The child operates in its own clean context, completes the sub-task, and returns only the result to the main agent. The main context stays focused on orchestration, not implementation details.
In practical terms: a multi-module migration that would previously exhaust a single context window can now be split into parallel subagent invocations, each handling one module independently. Total wall-clock time drops; context quality stays high throughout.
Live Voice Transcription#
The previous voice input approach collected a raw audio file and passed it to the model in batch. This introduced latency between speaking and seeing the transcription, which broke conversational flow.
2.0 replaces that with live transcription: text appears as you speak, character by character, directly in the input field. The practical benefit is most visible during code review sessions and architecture discussions where you want to dictate multi-step instructions without context-switching to a keyboard.
Security Permission Model — The 4-Stage Whitelist#
As Projects expand the agent’s operating scope across multiple directories and repositories, fine-grained permission control becomes essential. Antigravity 2.0 presents a four-tier authorization dialog every time the agent attempts a terminal command or filesystem operation that has not been pre-approved.
Understanding the Four Permission Tiers#
| Tier | Label | Scope | When to use |
|---|---|---|---|
| 1 | Yes, allow this time | Single execution | One-off commands in untrusted contexts |
| 2 | Yes, always allow in this project | Project-scoped whitelist | Trusted commands within a specific Project boundary |
| 3 | Yes, always allow | Global whitelist | Commands you trust unconditionally across all contexts |
| 4 | No (tell the agent what to do instead) | Immediate block | Suspicious or unintended commands; redirects agent to an alternative |
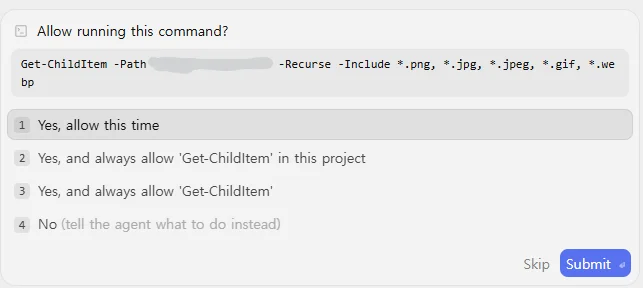
The production-safe pattern is to use Tier 2 for routine development operations within a trusted repository — git status, npm test, pytest, and similar — and reserve Tier 3 only for commands you have audited and are comfortable running in any project context. Tier 4 is your circuit breaker: if the agent proposes something unexpected, denying it here lets you type a corrected instruction without interrupting the overall session.
Frequently Asked Questions#
I installed Antigravity 2.0 and there is no code editor. Is something missing from the installation?
No — this is expected behavior. Antigravity 2.0 is a pure agent orchestration hub. It deliberately contains no text editor, file browser, or terminal panel. To write or review code, install Antigravity IDE or VS Code separately and run them side by side with 2.0. This is Google’s officially recommended Dual-Wielding configuration.
After installing 2.0, launching my existing IDE now opens the 2.0 shell instead. How do I recover?
This is the Electron app.asar directory collision bug. Close all Antigravity processes, navigate to your existing IDE installation directory, and delete the app.asar file the 2.0 installer injected there. Then re-run the 2.0 installer and redirect it to a fully isolated path such as C:\Program Files\Google\Antigravity 2.0\. After reinstalling to the isolated path, both applications will launch independently.
git status and git pull hang indefinitely when I run them through the Antigravity IDE agent. What is causing this?
This is a confirmed permissions regression in the latest Antigravity IDE release. The agent permission authorization popup stops appearing, leaving the agent waiting indefinitely for approval it never receives. The recommended fix is to uninstall the current IDE and reinstall Antigravity IDE 1.23.2 from the official releases page at https://antigravity.google/releases. Hold at that version until Google ships a patch.
I am worried about runaway API costs when using /goal without monitoring. Is there a budget guard?
Yes. Before invoking /goal, configure a budget_limit in your project’s JSON hooks or settings profile. This sets a hard ceiling on maximum token spend and maximum execution steps per session. When the agent reaches either limit it halts and enters an idle state, regardless of whether the goal condition has been met. Always set this guard before leaving an autonomous session unattended.
What is the difference between “always allow in this project” and the global allow option in the permission popup?
“Always allow in this project” whitelists a command only within the currently scoped Project’s directory tree. The global option removes the approval prompt for that command across every project on your machine. For production systems, project-scoped whitelisting is the safer posture: it limits the blast radius if the agent misinterprets a task and attempts an unintended operation outside its expected working directory.